Chronicles Of Bacon Lust...

Looking for the Perfect Appetizer? Look No More. Bacon and Tuna Poke!

Bacon and Tuna Poke 1

Sashimi grade yellowfin tuna and smoky bacon? Yes, please!

This appetizer requires the freshest — and I mean freshest — yellowfin tuna you can find. Sashimi means “pierced body”, as the tuna are line caught, then killed instantly with a sharp spike driven through the brain. This method virtually eliminates any build up of lactic acid in the fish’s body and, on ice, will stay fresh for a week or even longer. The fish is traditionally cut in thin strips and served atop an Asian white radish with soy sauce and wasabi. A tribute to the Japanese culture’s appreciation of subtlety, sashimi is widely regarded as the finest dish in the nation. What we’re looking to make today is not sashimi in the traditional sense as our presentation differs, but the quality is the same, and that’s what we’re after.

Poke is a Hawaiian raw salad — with fish — served as an appetizer, so we’re really doing a one-off from the typical poke with our ingredients, most notably, the cooked bacon. Gotta cook the bacon…

Poke ingredients

Bacon and Tuna Poke!
Author: 
Recipe type: Appetizer
Cuisine: Asian/Hawaiian fusion
Prep time: 
Cook time: 
Total time: 

Serves: 16
 

Ingredients
  • POKE:
  • 1 pound yellowfin tuna, diced into ¼ inch pieces.
  • ¾ pound of thick-cut smoked bacon, diced.
  • ½ cup finely diced red onion.
  • 1 tablespoon minced fresh ginger.
  • 1 tablespoon minced garlic.
  • ½ cup chopped green onion.
  • SOY-SESAME DRESSING:
  • ¼ cup low sodium soy sauce.
  • 2 tablespoons sesame oil.
  • 2 tablespoons water.
  • 1 teaspoon crushed red pepper flakes.
  • 1 teaspoon sea salt.
  • 1 teaspoon cracked black pepper.
  • 1 tablespoon sesame seeds, toasted.
  • TO SERVE:
  • 2 avocados, peeled, pitted and mashed.
  • 16-18 fried wontons.

Instructions
  1. DRESSING:
  2. Combine soy sauce, sesame oil, water, chili flakes, salt, pepper and sesame seeds in small bowl and whisk well. set aside.
  3. BACON:
  4. In a skillet or wok, slowly cook bacon over medium low heat, stirring continuously until 50% rendered. For tender bacon, quit at this stage and drain on paper towel. For crispy bacon, continue until completely rendered, and drain.
  5. ASSEMBLY:
  6. In a large bowl, combine the bacon, tuna, onion, ginger, garlic and green onion. Add the dressing and toss. Season to taste.
  7. TO SERVE:
  8. Spoon 1 tablespoon avocado mash on to fried wonton wrapper. Top with bacon-tuna mixture.

To start, fry your wonton wrappers and let them cool. I used square wrappers that I cut into circles, ’cause that’s the kind of guy I am.

Won Ton prep

Deep fry won ton

While you keep an eye on the wonton wrappers (takes only 15 seconds or so depending on how hot your oil is), cook the bacon. Use really thick-cut smoked bacon for this recipe. I head straight to the meat counter and have the butcher select the best slices. Cut the bacon to size with kitchen shears, then toss into your skillet or wok. I prefer a wok for this recipe.

Poke bacon in wok

With your wonton wrappers fried and the bacon cooked and draining on a paper towel, dice the yellowfin tuna. A very sharp knife is your best friend now. Slow and steady here, don’t slice your finger. Not that I’m speaking from experience or anything.

Yellow fin tuna for poke

Starting to look good!

Poke ingredients coming together

Once thoroughly mixed, begin your assembly. The finished product looks like this:

Bacon and Tuna Poke 2

I will serve these delicious, decadent little morsels at our neighborhood Holiday party this weekend. If you’re looking for an unbelievable appetizer for your holiday bash, stop. Paired with champagne, fume blanc, or pinot noir for the red drinkers, how can you go wrong? You can’t…unless you get the date of your party confused with your next dental appointment.

This recipe is from the great cookbook, I Love Bacon! authored by Joyce Rockmill. It’s a great resource — check it out for other chef inspired bacon delights!

The Aliens Made Me Do It, Really! Bacon & Sun Dried Tomato Scones!

The Bacon Hunter's Bacon & Sun Dried Tomato Scones!

For those of you with a “Bucket List”, scratch off: Being Kidnapped By Aliens. It’s not all that it’s cracked up to be. For starters, there’s a massive language barrier. There was that anal probe thing. Twice. I don’t share their obsession with Barry Manilow. They don’t drink coffee. But the deal breaker — and the reason I finally had to say “adios” — was THEY DON”T LIKE BACON. Shocking.

The whole time I’m hanging with these guys, all I could think about was a warm bacon and sun dried tomato scone and a hot cup of coffee. Needless to say, when the opportunity presented itself — the death ray was down for maintenance — I “requisitioned” an escape pod and flew the coup. It’s good to be back.

On to the scone…

Bacon and Sun Dried Tomato Scone Ingredients

5.0 from 1 reviews

Bacon & Sun Dried Tomato Scone
Author: 
Prep time: 
Cook time: 
Total time: 

Serves: 16
 

A tasty bacon and sun dried tomato scone — perfect any time of day!
Ingredients
  • ¾ cup dried tomatoes (not oil-packed)
  • 2½ cups all-purpose flour
  • 1 tablespoon baking powder
  • 1 teaspoon dried basil, crushed
  • 1 teaspoon dried oregano, crushed
  • ¼ teaspoon garlic salt
  • ¾ cup butter, cut up
  • 8 slices bacon, crisp-cooked, drained, and crumbled
  • ¼ cup sour cream
  • 2 eggs, lightly beaten
  • 2 tablespoons milk
  • ½ cup shredded mozzarella cheese

Instructions
  1. Preheat oven to 400 degrees F. Place tomatoes in a bowl. Add enough boiling water to cover. Let stand 5 minutes. Drain well; chop tomatoes.
  2. In large bowl combine flour, baking powder, basil, oregano, and garlic salt. Cut in butter until mixture resembles coarse crumbs. Stir in chopped tomatoes and bacon. Make a well in center of flour mixture; set aside. In small bowl combine sour cream, eggs, and milk; add all at once to flour mixture. Stir with a fork just until moistened. Turn dough out onto a lightly floured surface. Knead dough gently 10 to 12 strokes or until dough holds together. Divide in half. Pat or lightly roll each dough half to a 7-inch circle. Cut each circle in 8 wedges.
  3. Place wedges 2 inches apart on a large baking sheet, no grease. Bake for 5 minutes. Sprinkle tops of scones with cheese. Bake 7 to 8 minutes more or until tops are lightly browned. Serve warm.

When the recipe calls for crumbled bacon, I use kitchen shears and cut the bacon into 1/2” to 3/4″ chunks, tossing the bacon in a wok over low heat. I find it more efficient than using a skillet or baking sheet, but that’s just me.

Bacon sizzling in Wok

For the dry ingredients, I found using a whisk achieved the result I was looking for, and made adding the butter a snap.

Bacon & Sun Dried Tomato Scone Mixed Ingredients

When thoroughly mixed, knead the dough on a lightly floured surface until the dough holds together. Form into a 7″ round, and cut into 8 sections. If you’re going for Starbucks sized scones, cut in 3 sections…

Scone Dough cut and ready to go

Transfer to a baking sheet — I used a silicone liner — and then into the preheated oven. After 5 minutes or so, remove from the oven and add shredded mozzarella over the top, returning to the oven to finish.

Partially baked scones with mozzerella cheese added

10 minutes more, and you’re finished! Let the scones cool a bit, and enjoy with a nice cup of coffee!

Bacon Hunter's Bacon & Sun Dried Tomato Scones

Tasty! Sun dried tomatoes always seem to add an air of refinement to a recipe, and it’s certainly the case here. The bacon flavor dominates, though, and that’s what we’re after. Had the aliens offered me coffee and one of these scones, I might have been able to see past the Barry Manilow fascination. Wasn’t going to happen…bless their hearts, they do not know what they’re missing!

Wedge Salad with Candied Bacon!

I am an omnivore with strong carnivore tendencies. I know….you’re shocked. Wife, however, is an omnivore with herbivore leanings. She loves a big bone-in rib eye on occasion, but prefers salads as entrées most of the time. Her typical lunch is non-fat Greek yogurt and blueberries. Me? You don’t want to know. At home, we consume more fish, poultry and pork than red meat, and she’ll opt for grilled veggies on the side, where, when given the choice, I would go for rice or potatoes. Both of us eat a lot of fruit. I have a bad peanut habit, and can’t keep them in the house. Over the years I have come to understand and appreciate Wife’s perspective when it comes to food choices, albeit grudgingly. It kills me not to wolf down a double cheeseburger when I know no one’s looking, but let’s be honest, you just can’t do it without paying a price…on any number of levels.

So…eat the rabbit food and splurge on the good stuff! This is pretty much why my bacon obsession works, and this Wedge Salad is a perfect example. I classify it as an entrée, not a starter, because it’s huge — a quarter head of lettuce or more, big wedges of tomatoes and lots of candied bacon! Obviously there is not much to this, but I want to stress that the tangy home-made buttermilk and bleu cheese dressing — along with the candied bacon — totally make this salad. Do not, I repeat, do not use store-bought dressing! This dressing is easy to make and really, really tastes so much better than the crap on the supermarket shelf. Trust me here.

Wedge Salad with Candied Bacon and Buttermilk Bleu Cheese!
Author: 
Recipe type: Salad / Entree
Prep time: 
Cook time: 
Total time: 

Serves: 2
 

A big salad with candied bacon and tangy dressing that works well as an entree.
Ingredients
  • For the salad:
  • ½ head iceberg lettuce.
  • 1 large tomato.
  • ¼ cup crumbled blue cheese.
  • ½ cup chopped red onion.
  • Croutons. (I used store-bought, but if you wish to make your own, go for it!)
  • Chives.
  • For the bleu cheese dressing:
  • ½ cup crumbled blue cheese, softened.
  • ¼ cup mayonnaise.
  • ¼ cup sour cream.
  • 1 tablespoon lemon juice.
  • 3 tablespoons buttermilk.
  • ⅓ cup chopped chives.
  • ½ teaspoon sea salt.
  • 1½ teaspoons black pepper.
  • For the bacon:
  • 6 strips thick cut bacon.
  • ¼ cup packed brown sugar.

Instructions
  1. Bacon:
  2. Preheat oven to 400 degrees.
  3. Spread the bacon strips on a baking sheet. Bake the bacon in the oven for 15 minutes. Remove from the oven and sprinkle the brown sugar liberally over the hot bacon, and place back in the oven for 5 to 10 minutes more, or until the sugar has “candied”.
  4. Allow to cool before chopping into ½ inch wide strips.
  5. Dressing:
  6. Whisk all ingredients together until mixture is well-combined.
  7. Assemble:
  8. Cut the lettuce into two equal wedges and place on two plates.
  9. Pour enough dressing over the lettuce to get good coverage.
  10. Cut the tomato into wedges and distribute evenly between the two plates. Sprinkle additional bleu cheese over this and add the chopped onion, bacon and croutons. Garnish with chives and serve.

Look at that bacon. Brings a tear to my eye.

That’s it. This carnivore will be enjoying a big New York Strip, baked potato, and a smaller, wimpier version of this salad at a well-known steak house in a couple of days. The steak will be medium rare, juicy and delicious, the potato — loaded with sour cream and chives, and the restaurant wedge salad…well, it will pale in comparison to this beauty!

Slow Cooked Bacon-Wrapped Apple BBQ Chicken. The Easiest Ever!

I’m not overselling the post title — short of opening up a can of beans and bacon and eating it cold, or eating a bag of carrots, this really is one of the easiest meals you can make. This recipe is also an inexpensive way to feed four people, and BTW, it’s tasty, too! Delicious, cheap and easy always works for me. No, don’t you go there… we’re not talking about that certain someone you dated in college…

Just for kicks, here are my cost breakdowns, including zucchini & cheese side. Your cost will certainly be lower (I’m in Southern California). Serves 4.

  • Chicken Breasts (2 pounds): $12.00
  • 8 Slices bacon: $2.00
  • 5 Gala apples (small): $3.00
  • 1 Lemon: $.75
  • 1 cup BBQ sauce: $1.65
  • 1/4 cup brown sugar: $.25
  • 4 Zucchini: $2.00
  • 1/2 cup shredded cheese: $1.00
  • Total: $22.65 / $5.66 per person

The ingredients and cooking instructions, AKA: The Recipe

Easiest Slow Cooked Bacon Wrapped Apple BBQ Chicken, Ever!
Author: 
Prep time: 
Cook time: 
Total time: 

Serves: 4
 

Slow cooked bacon wrapped BBQ chicken and apples — moist and tender!
Ingredients
  • 4 chicken breasts.
  • 8 Slices bacon
  • 5 Small Gala apples, peeled and chopped
  • 1 Lemon, juiced.
  • 1 cup BBQ sauce
  • ¼ cup Brown sugar
  • 4 Zucchini, sliced in half lengthwise.
  • ½ cup Shredded cheese.

Instructions
  1. For Chicken:
  2. In small bowl, combine BBQ sauce with chopped apple, brown sugar & lemon juice.
  3. Wrap 2 pieces of bacon around each chicken breast, and place chicken breasts in base of slow cooker.
  4. Pour BBQ/apple mixture over the chicken.
  5. Set to “Low” and cook for 4 hours, or until internal temperature of chicken is 165 degrees. Check with meat thermometer.
  6. For Zucchini:
  7. Par boil whole zucchini for 2 minutes or until slightly tender.
  8. Drain and cool.
  9. Cut in half lengthwise and remove pulp.
  10. Season to taste.
  11. Place cheese in “zucchini canoe” and broil until cheese melts/bubbles.

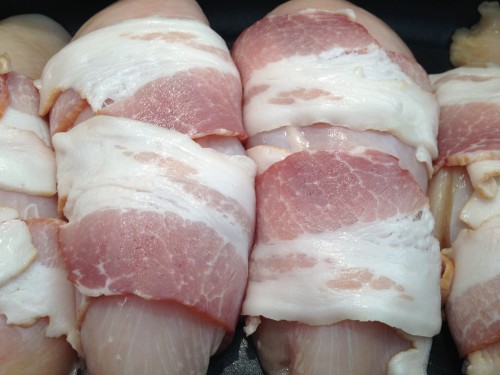
On a cutting board, lay out two strips of bacon side by side about an inch apart, placing the chicken breast in the middle — perpendicular to the bacon. Wrap each end of the bacon strip back on to the chicken breast. Transfer the meat to the slow cooker.

Combine the chopped apples, BBQ sauce, brown sugar and lemon juice. Mix thoroughly.

Pour the mixture over the chicken breasts, spreading as evenly as possible. Place the lid on the slow cooker, set your timer, and go out and save the world or something for 4 hours. Read a book. Maybe go to work for a while. Knit. Play ice hockey. Help old women across the street! You get the picture — time is precious, so make the most of it. You’ll never get those 4 hours back, so do not choose poorly…

Well, you’re not out saving the world just this second… so while the bacon wrapped chicken is slow cookin’, let me introduce you to the Ninja 3-in-1 Cooking System. Disclosure Alert! The Ninja was given to me by the manufacturer — Euro-Pro, free of charge. How did I get so lucky? I attended the International Food Blogger Conference last August in Portland, OR, and everyone there was quite shocked to learn that we all were getting hooked up! Cool! There were no strings attached, and in no way was it suggested that I feature this product in my blog or provide a “review” of the Ninja in exchange for the product itself. My words are my own.

I’ve used a number of slow cookers over the years, and as I discovered with this dish, the Ninja works great in that capacity. The chicken was moist and tender, the apples soft and delicious. Clean up consisted of a quick wipe down with soap and water. What makes the Ninja really unique though, is its ability to conquer other cooking tasks like searing, roasting, simmering, sautéing and baking as well. Used to its full potential, it’s a good buy, but if all you ever do is slow cooking or “crock pot” type of meal preparations, the cost will be a deal breaker. Bottom line: It’s a versatile, well made appliance that is much more than “just” a slow cooker — it’s definitely worth a look if you’re in the market for such an item. I like it, and I’ll continue to use it.

Where were we? Oh, right. Zoom ahead 4 hours… I checked the chicken with a meat thermometer and it read 165 degrees — done! Plate up the bacon wrapped chicken breast, top with the apples and add the side of cheese loaded zucchini. How easy is that? Enjoy a nice, leisurely meal…some candles for ambiance and maybe a glass of wine, too. But when you’re finished, promise me: you’ll get back out there and save the world — there’s certainly plenty to do!

I’m right behind you, just one more bite! Bacon!!

Start A Revolution! Dessert First!

I am going to challenge you and the status quo with this question: Why would you wait until after you finish your meal to try this symphony of sweetness? Why? I say skip the salad and main course and dive right into this baby! Come on! Let’s shake things up! Dessert First!

“But Michael, that’s just not proper!” Tell me that after you have tried this. It’s that good! Sweet mission figs and gala apples over vanilla ice cream topped with a maple syrup and brown sugar sauce and candied bacon. Are you kidding me? It’s unbelievable.

Pig & Fig Sundae
Author: 
Recipe type: Dessert
Prep time: 
Cook time: 
Total time: 

Serves: 4
 

Ingredients
  • Vanilla ice cream
  • 5 slices of thick-cut bacon
  • ½ cup mission figs cut into bite-sized chunks
  • ½ cup sweet apples (like Gala) cut into bite-sized chunks
  • 3 tablespoons maple syrup
  • 5 tablespoons brown sugar (3 TBSP for sauce, 2 TBSP for sprinkling over bacon)
  • Pinch of salt

Instructions
  1. Preheat oven to 400 degrees.
  2. Place the figs and apples into a small saucepan and add water to cover the fruit about halfway.
  3. Stir in the maple syrup, brown sugar and salt.
  4. Bring to a boil and let simmer, stirring occasionally, for about 15-20 minutes or until the figs are falling apart and the apples are tender.
  5. Remove the fruit and keep the liquid simmering over medium-low heat until it’s thick and syrupy.
  6. Set aside and allow to cool.
  7. Meanwhile, spread out the bacon on baker’s half sheet.
  8. Bake in oven at 400 degrees for 15-20 minutes.
  9. Remove from oven and sprinkle with brown sugar, then return to the oven for about 5 minutes.
  10. Remove bacon from half sheet and lay on paper towel to drain and cool.
  11. Chop or crumble the bacon into bits.
  12. Scoop the ice cream into a dish, top with the fruit and syrup and sprinkle on the candied bacon bits.

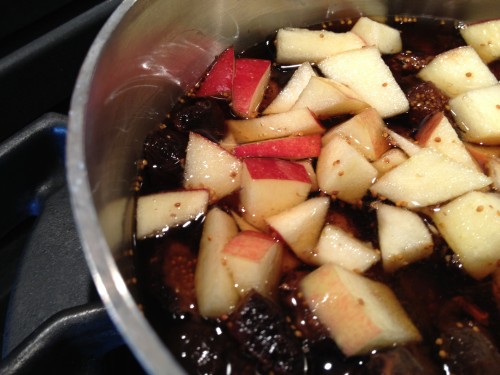
Things are going swimmingly for these brothers-in-arms, Mission figs and Gala apples.

If bacon is meat candy, what then, is candied bacon? Damn good, I’ll tell you that!


Served with a dessert wine, Pedro Ximénez Sherry or port, this is worth overthrowing the establishment!

Hell, I’m going to have it for breakfast!

Super Easy Bacon Wrapped Eggplant

First, a confession. I don’t really like eggplant. Wife does though, and since I love bacon, what’s the worst that could happen? Exactly. Happy Wife, happy life.

I made this appetizer for a fundraiser “pre-party soiree” held at our neighbor’s house, and it was my first effort with this combination of ingredients. I was actually surprised! It was good! Thick cut, hickory smoked bacon and eggplant — sliced about 1/2 inch thick, baked and broiled — produced a nice little appetizer if I do say so myself. The eggplant took on the smoky flavor of the bacon, and the meaty texture of both ingredients provided a nice alternative to carrot sticks and radishes that “someone” (who shall remain nameless…cough, cough) wanted to take to the festivities. It is the easiest thing in the world to make, too: slice the eggplant, wrap said slices in bacon, put in the oven…and, done!

The ingredients. Both of them….

Super Easy Bacon Wrapped Eggplant
Author: 
Recipe type: Appetizer
 

Beats the hell out of a veggie plate!
Ingredients
  • 2 Large Eggplants
  • 1 pound thick-cut, hickory smoked bacon
  • 1 TSP Salt (to wick moisture out of eggplant)
  • Salt & fresh ground pepper to taste

Instructions
  1. Wash and pat eggplant dry. Slice into ½ inch round slices.
  2. Arrange the slices on a baking sheet lined with a paper towel. Sprinkle the 1 tsp. salt over the tops of the eggplant slices. Cover with another paper towel, and let sit for 30 minutes. Wipe the moisture off the slices, and discard the paper towels.
  3. Wrap each slice of eggplant with a piece of bacon. Place on the baking sheet, and sprinkle with a dash of salt and fresh ground pepper to taste.
  4. Bake at 375 degrees F, for 30 minutes (depending on thickness of bacon) until bacon is sizzling and both bacon and eggplant are slightly browned.
  5. (Optional) Crisp under broiler for 1-2 minutes.
  6. Cut each slice into quarters and serve.

After arranging the eggplant slices on a half sheet, sprinkle with salt and cover for 30 minutes. This wicks some of the moisture out of the eggplant, and helps to cut the acidity, too.

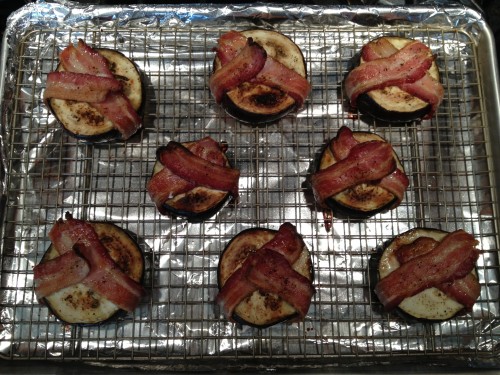
Wipe off the moisture, wrap with the thick cut bacon, and place on a rack or parchment paper on a baker’s half sheet.

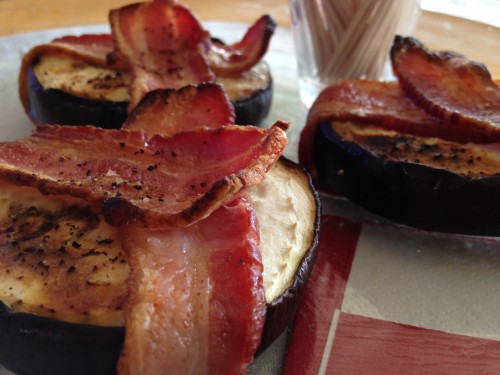
Into the oven, and then under the broiler to crisp, and you’re done. How easy is that!

Cut each slice into quarters and serve as finger food, toothpicks optional of course. Seriously….this….or a wet radish?

Pizza. The Perfect Food Made Better: Bacon & Roasted Poblano Chili Pizza!

As Wife will attest, I never met a pizza that I didn’t like. Traditional Italian pizza — real pizza — is the best, and home-made, take-out or even frozen pizza is awesome. One can make the case that it is the perfect food. Easy to make, you eat it with your hands, and depending on the toppings, it has all the good stuff you need in a meal: carbohydrates, dairy, fruits or vegetables and protein. Hot from the oven or cold from the ‘fridge, pizza tastes great — it’s genius!

But bacon and pizza? That’s genius on steroids! This pizza is better than perfect!

I made two pizzas — the first one using pizza sauce and mozzarella cheese, and the second pizza using marinara sauce and goat cheese! Double the recipe if you are making two pizzas…

Bacon & Roasted Poblano Chili Pizza!
Author: 
Recipe type: Entree
Prep time: 
Cook time: 
Total time: 


A delicious artisan style pizza!
Ingredients
  • 1 package prepared pizza dough (Trader Joe’s has a great packaged pizza dough)
  • ½ cup marinara sauce (or pizza sauce)
  • 3-4 pieces of bacon, cooked crisp and chopped
  • 1 ear of corn, roasted and cut off the cob
  • 1 poblano pepper, roasted and sliced
  • ½ red onion, sliced
  • ½ cup shredded Mozzarella (or goat cheese)

Instructions
  1. Open pizza dough package and let the dough rest for twenty minutes.
  2. While dough is resting, prepare bacon using your favorite method. Pat dry using a paper towel and chop into ¾ inch pieces.
  3. On hot grill, or under broiler, char corn, poblano chili peppers and onion. Remove corn from cob, and set aside along with peppers, onion and chopped bacon.
  4. Free form pizza dough, making a thin crust by following package directions.
  5. Bake dough for 5 minutes at 450 degrees on a cookie sheet lined with foil.
  6. Remove dough from oven, and spread the sauce on the pizza in a thin layer leaving about 1 inch border at the edge.
  7. Add ½ of the cheese. Brush exposed edge of pizza dough with olive oil.
  8. Now add the bacon, corn, onions, and poblano chili peppers, and top with the remaining cheese.
  9. Bake in the oven directly on the rack according to dough package directions or until the cheese is nice and bubbly. Estimate about 10 -12 minutes.
  10. Enjoy!

Shhhh! Pizza dough taking a flour nap….

The bacon baked in the oven at 400 degrees for 20 minutes. While the dough was resting and the bacon was baking, I grilled the veggies on the BBQ grill.

The ingredients added and the pizzas assembled, the goat cheese pizza is anticipating it’s next move…which is into the oven.

Both artisan pizzas baked, looking delicious, and it’s time to eat! Goat cheese on the right, mozzarella on the left. If you have more time and wish to make your own dough from scratch, go for it, but the store-bought products are pretty good these days. Regardless, the free form artisan style pizza make you feel like you’ve classed up a very common meal, and adding goat cheese certainly doesn’t hurt. Seriously? Who am I kidding…it’s the bacon!

Goat cheese is impossible to shred unless it’s frozen — and that’s an option — but I just pulled apart the room temp cheese and left it chunky. As such, it dominated the flavors on the pizza, but interestingly, it accentuated the roasted corn. On the mozzarella version, the bacon was by far the dominate flavor. The poblano chilli pepper adds a mild bite, and complements the other veggies nicely. Roasting the vegetables is the way to go. Both pizzas were really excellent.

Have you ever seen a cork hold up a bottle of Chianti? Didn’t think so…

The “Goldilocks Principal”, and Bacon & Radish Chicken Noodle Soup!

After a couple of spoonfuls of this soup, you’ll be thinking Goldilocks had it pretty well figured out… OK, work with me here — no, it’s not porridge, it’s soup — but I guarantee that you’ll feel “just right” after you taste it. And there’s our segue to The Goldilocks Principal: Scientists & economists (and food bloggers) named it for those special moments in time when the universe aligns, and conditions are such that good things happen. In other words, of the great range of all possible conditions on Earth, the actual conditions are “just right” to support life, or occasionally, moderate economic growth and low inflation — but in this case, a decent bowl of soup! The Goldilocks Principal. Think about it… what if bacon didn’t exist?

A bacon blog and you’re talking science, economics, philosophy and nursery tales…how cool is that?

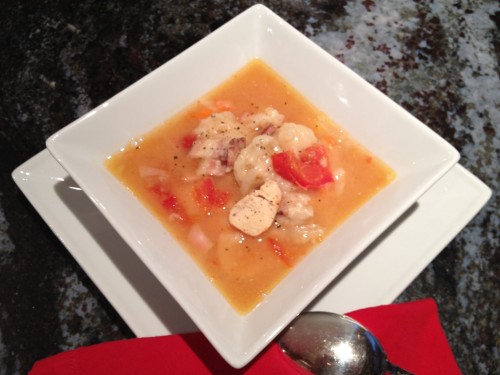
This is a hearty soup with an interesting combination of flavors: the radish gives it punch because of it’s peppery characteristic, and the bacon complements that with the unmistakable salty, smoky signature it brings to the bowl. The other veggies, pasta and chicken make it a meal — it’s really tasty!

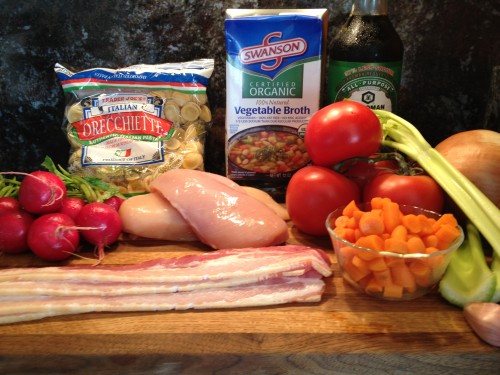
On to the ingredients:

Bacon & Radish Chicken Noodle Soup!
Author: 
Recipe type: Entree
Prep time: 
Cook time: 
Total time: 

Serves: 8
 

A hearty chicken noodle soup with a bite and smoky bacon flavors.
Ingredients
  • 4 Cups Vegetable Broth (one container of the boxed organic kind).
  • 4 Cups Water.
  • 2-3 Cloves Garlic, minced.
  • 4 Tomatoes.
  • 1 Celery Stalk.
  • 2 Carrots.
  • ¾ - 1 Yellow Onion.
  • 6 Red Radishes.
  • ½ Package Pasta (Trader Joe’s has some great noodles for soups).
  • 2 Chicken Breasts — about ¾ pound.
  • 5-8 Slices Bacon, depending on thickness.
  • 2 TBSP Olive oil.
  • 1 TBSP Soy sauce.
  • Salt.
  • Pepper.

Instructions
  1. Dice celery, carrots, onion, radishes and tomatoes.
  2. Using your favorite method, cook bacon until crispy, pat dry and chop into ½ inch sections.
  3. Chop chicken into bite-sized pieces.
  4. Heat oil in small frying pan on medium, and add chicken.
  5. Cook chicken halfway through (3-4 minutes), then add soy sauce and finish cooking chicken.
  6. Transfer chicken and bacon to dutch oven or slow cooker (preferred).
  7. Add liquids, vegetables and garlic.
  8. Salt and pepper to taste.
  9. Simmer for 3 hours — low heat setting.
  10. Add uncooked pasta 30 minutes before serving.

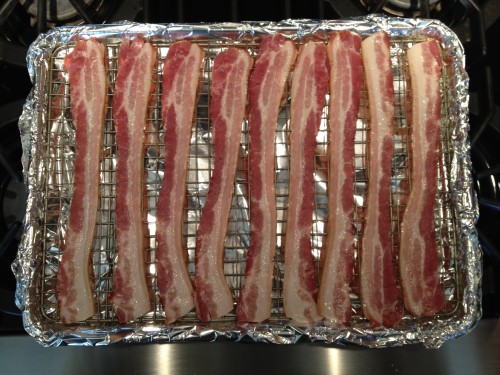
For this recipe, I baked the bacon in the oven at 400 degrees for 25 minutes, and I used a lot. Hello! That’s a baker’s half sheet!

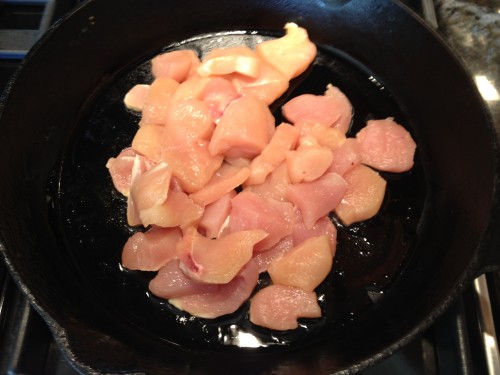
While the bacon was in the oven, I cooked the chicken in a cast iron skillet.

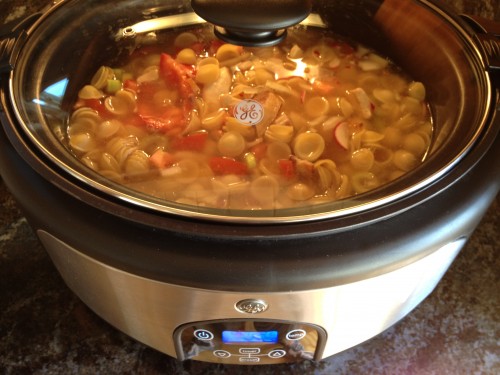
When the chicken was done, all the ingredients were introduced to each other in the slow cooker — or soup jacuzzi as I like to call it - to simmer for at least three hours.

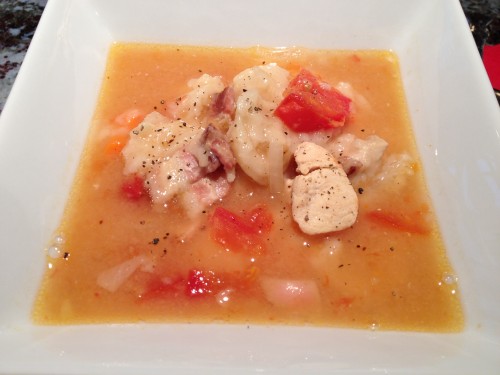
After allowing Goldilocks to take a 3 hour snooze in Wee Bear’s bed, it’s time to call her to the table. The Bacon & Radish Chicken Noodle Soup is ready to eat!

You will enjoy this hearty soup. Served with a small salad, a loaf of artisan bread, and a glass of wine — it’s tough to beat. It is in fact, just right!

Praise the Lard*! It’s Bacon, Jalapeño Mac and Cheese!

“Mac and Cheese.”

Come on, say it with me: “Mac and Cheese.”

Admit it, you feel better, right? You can’t say “Mac and Cheese” without smiling, and saying it makes you feel good! Eating it makes you feel better. They don’t call it comfort food for nothing, now do they? Add bacon to everyone’s favorite and you’ll get an endorphin rush like you would not believe! Those happy chemicals in your body start to runnin’ around, and the next thing you know, you’re feelin’ it! Throw in a jalapeño and now you’re starting to sweat a little…. really, this dish is better than sex almost anything I can think of!

Praise the Lard, it’s Bacon, Jalapeño Mac and Cheese!
Author: 
Recipe type: Side dish or main course
Prep time: 
Cook time: 
Total time: 


Stand alone meal, or served as a meat entrée side dish — you can’t go wrong!
Ingredients
  • 1 pound macaroni (penne or elbow macaroni)
  • 4 cups hot milk
  • 1 stick of butter
  • ½ cup flour
  • 4 cups Gruyère cheese - shredded
  • 2 cups sharp Cheddar cheese — shredded
  • 2 TSP salt
  • 2 TSP pepper
  • ½ TSP nutmeg
  • 1 Jalapeño - diced
  • 8 - 12 slices of bacon, depending on thickness, cooked and cut into ½ inch chunks
  • Bread Crumbs

Instructions
  1. Pre-heat oven to 400 degrees F.
  2. Boil pasta as directed on the package, drain well.
  3. In separate pot warm milk over medium - low heat.
  4. Melt butter in large pot over low heat and whisk in flour for 2 minutes.
  5. Stir constantly.
  6. Whisk in hot milk.
  7. Bring heat to high and boil mixture, whisking until thick and smooth.
  8. Remove from heat.
  9. Add cheeses, salt, pepper and nutmeg.
  10. Add the diced jalapeño and bacon, then add pasta.
  11. Stir thoroughly.
  12. Pour into 9″x13″ baking dish and top with bread crumbs.
  13. Bake for 45 minutes.

Pretty easy. Boil, melt, whisk, stir and whisk. Stir some more and pour.

Below: Sorry, I couldn’t resist a gratuitous bacon shot — the bacon is ready, and the cheese jalapeño mixture is about to say hello to the penne pasta.

Thoroughly stirred, pour the mixture to the baking dish and covered with bread crumbs. Hey, is that the uncooked mac and cheese, or an intercepted photograph from NASA’s Mars Rover Curiosity? I think I see a footprint….

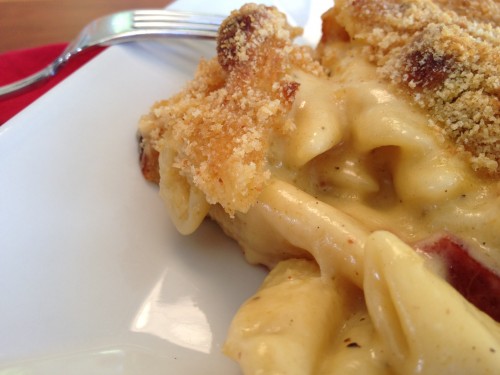
45 minutes later… you’re smiling!

It’s hot, it’s gooey and it’s got a little kick. And, praise the lard, discovered with every bite is that sweet, salty meat candy. Perfect as a side dish complementing your favorite meat entrée, or as a stand alone main course, this recipe will have your Mac and Cheese lovers in their comfort zone for sure!

* From Old French: lard (“bacon”), from Latin: lardum, laridum (“bacon fat”).

Bacon BBQ Sauce? But Of Course!

I’ve experimented with different recipes for a sweet, smoky and spicy BBQ sauce, and this one that I have adapted is good — really good. Bacon? Check! Bacon fat? Check, Check! Bourbon? Check! Agave? Check! Along with the rest of the ingredients, this recipe produces a sauce with a pronounced smoky aroma that belies the sweetness upon first taste, and then…bang…the spices kick in for a nice finish! There’s bacon in it, but it complements the other flavors and doesn’t overwhelm them — a nice balance.

Without further ado…

Bacon BBQ Sauce? But Of Course!
Author: 
Recipe type: BBQ Sauce
Prep time: 
Cook time: 
Total time: 


Yields approximately 16 oz.
Ingredients
  • ½ cup small-dice bacon (about 2 ounces)
  • ½ cup finely diced red onion (about ½ small onion)
  • 2 medium garlic cloves, finely chopped
  • 1 cup ketchup
  • ½ cup cider vinegar
  • ½ cup packed dark brown sugar
  • ¼ cup Worcestershire sauce
  • ¼ cup bourbon
  • 2 tablespoons dark or robust molasses (not blackstrap)
  • 2 teaspoons chili powder
  • 1½ teaspoons smoked paprika
  • 1 teaspoon ground mustard
  • Sea salt
  • Freshly ground black pepper

Instructions
  1. Place the bacon in a skillet over low heat and cook until crisp, about 15 minutes. Transfer the bacon to a paper towel-lined plate and pat dry. Remove skillet from heat. Finely chop the cooked bacon and set aside. Again, over low heat, add the onion to the skillet and cook in the bacon fat, stirring occasionally, until softened — about 3 minutes. Add the garlic and cook until fragrant, about 30 to 60 seconds.
  2. Now over medium heat, whisk in the remaining measured ingredients and season with a strong pinch each of salt and pepper. Stir in the reserved bacon and bring the mixture to a boil. Reduce the heat and simmer, stirring occasionally, until the sauce has thickened slightly and holds a line on the back of a wooden spoon when you drag a finger through it, about 25 minutes. Season with additional salt and pepper as needed. Transfer mixture to a blender and blend on high until smooth.

Drag your finger across the back of a wooden spoon to test that the mixture has thickened. If it holds the line, you’re done!

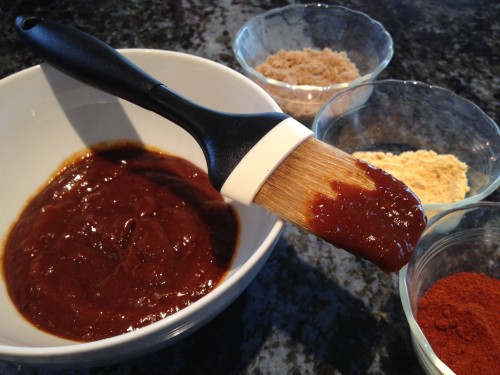
I poured the mixture to a bowl and allowed to cool before transferring to a blender…

The great thing about this and all BBQ sauces, really, is that you can experiment with different ingredients and amounts to tailor the flavor to your personal taste. Add more bacon or more bourbon, eliminate the Worcestershire sauce, substitute maple syrup or try different combinations of spices. As it stands, this recipe works for me.

This BBQ Sauce is a keeper! Put it on everything! I’m starting with pulled pork, and then some ribs, and then maybe a bacon double cheeseburger, and then some grilled chicken, and then I’ll use it as a pizza sauce, and then grill a few pork chops. If only it worked as a shampoo! Hey, wait a minute… that gives me an idea… I’ll be right back!